Food photography is an art that can make people drool over their screens or scroll right past. Whether you're starting a food blog, shooting for Instagram, or creating a food menu, nailing the right camera angle can make all the difference.
Let's dive into the top three go-to angles for food photography, when to use them, and, just as importantly when to avoid them. Oh, and I'll sprinkle in some extra tips to elevate your shots and help you choose the best angle for your food photos. Bon appétit!
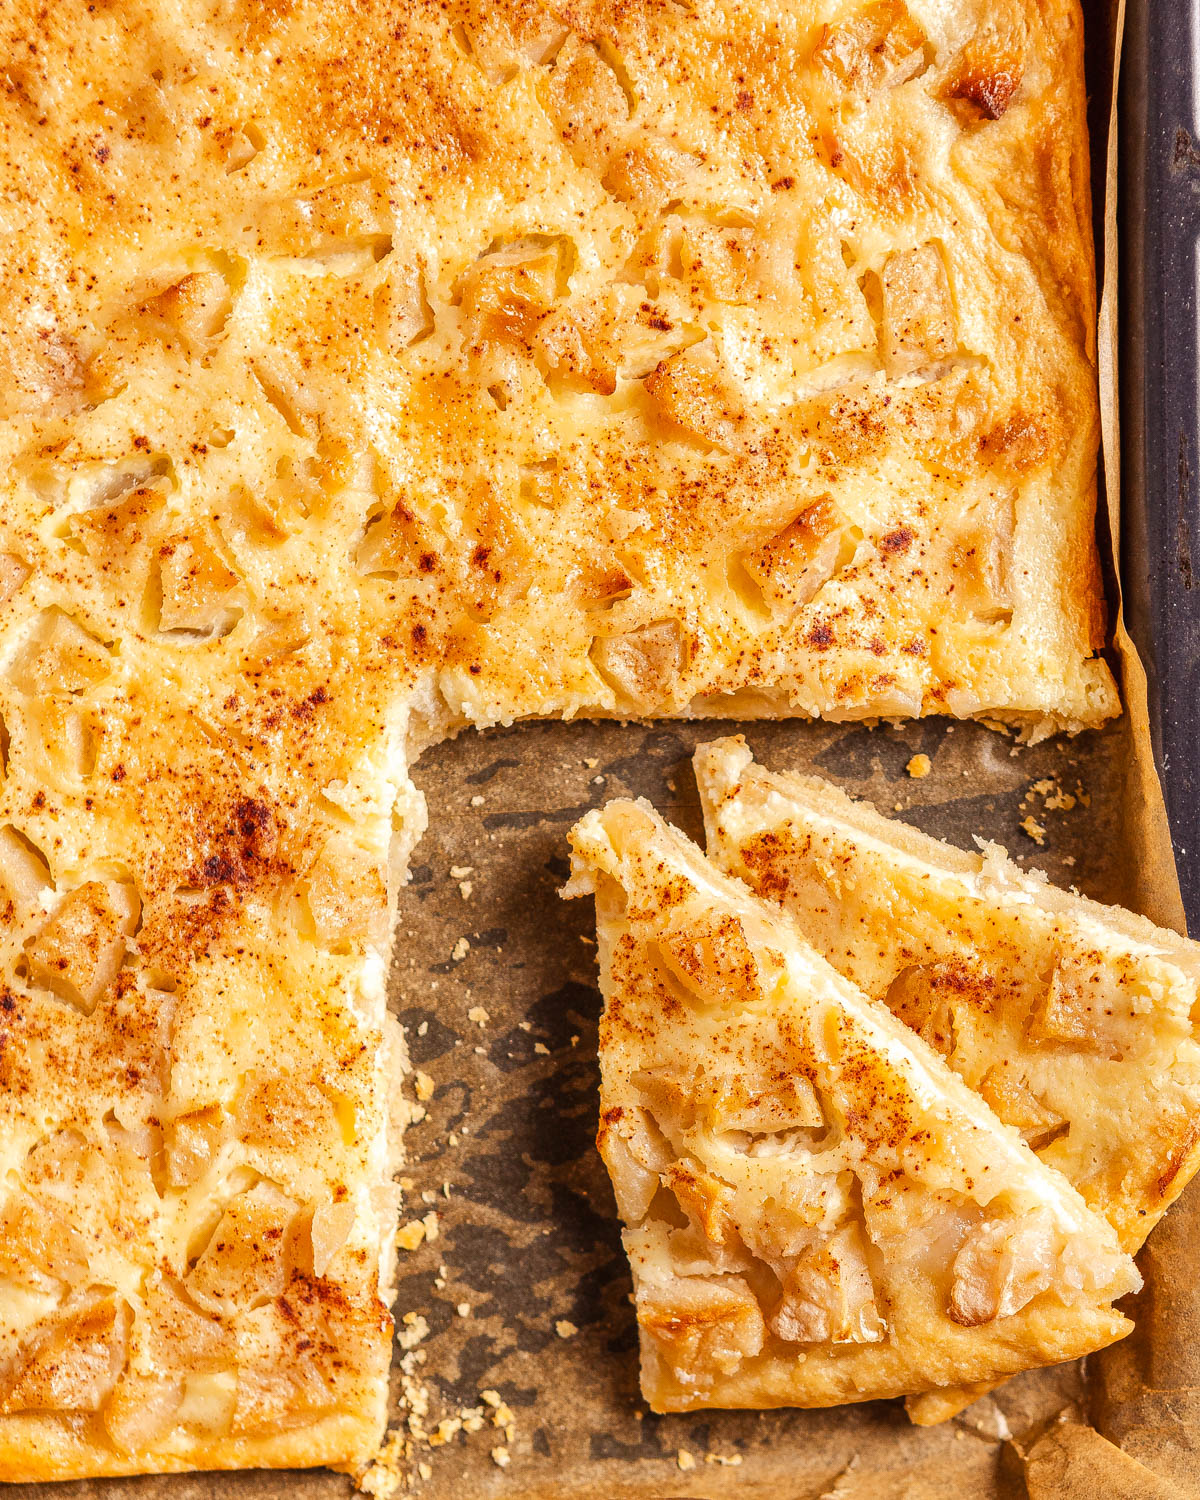
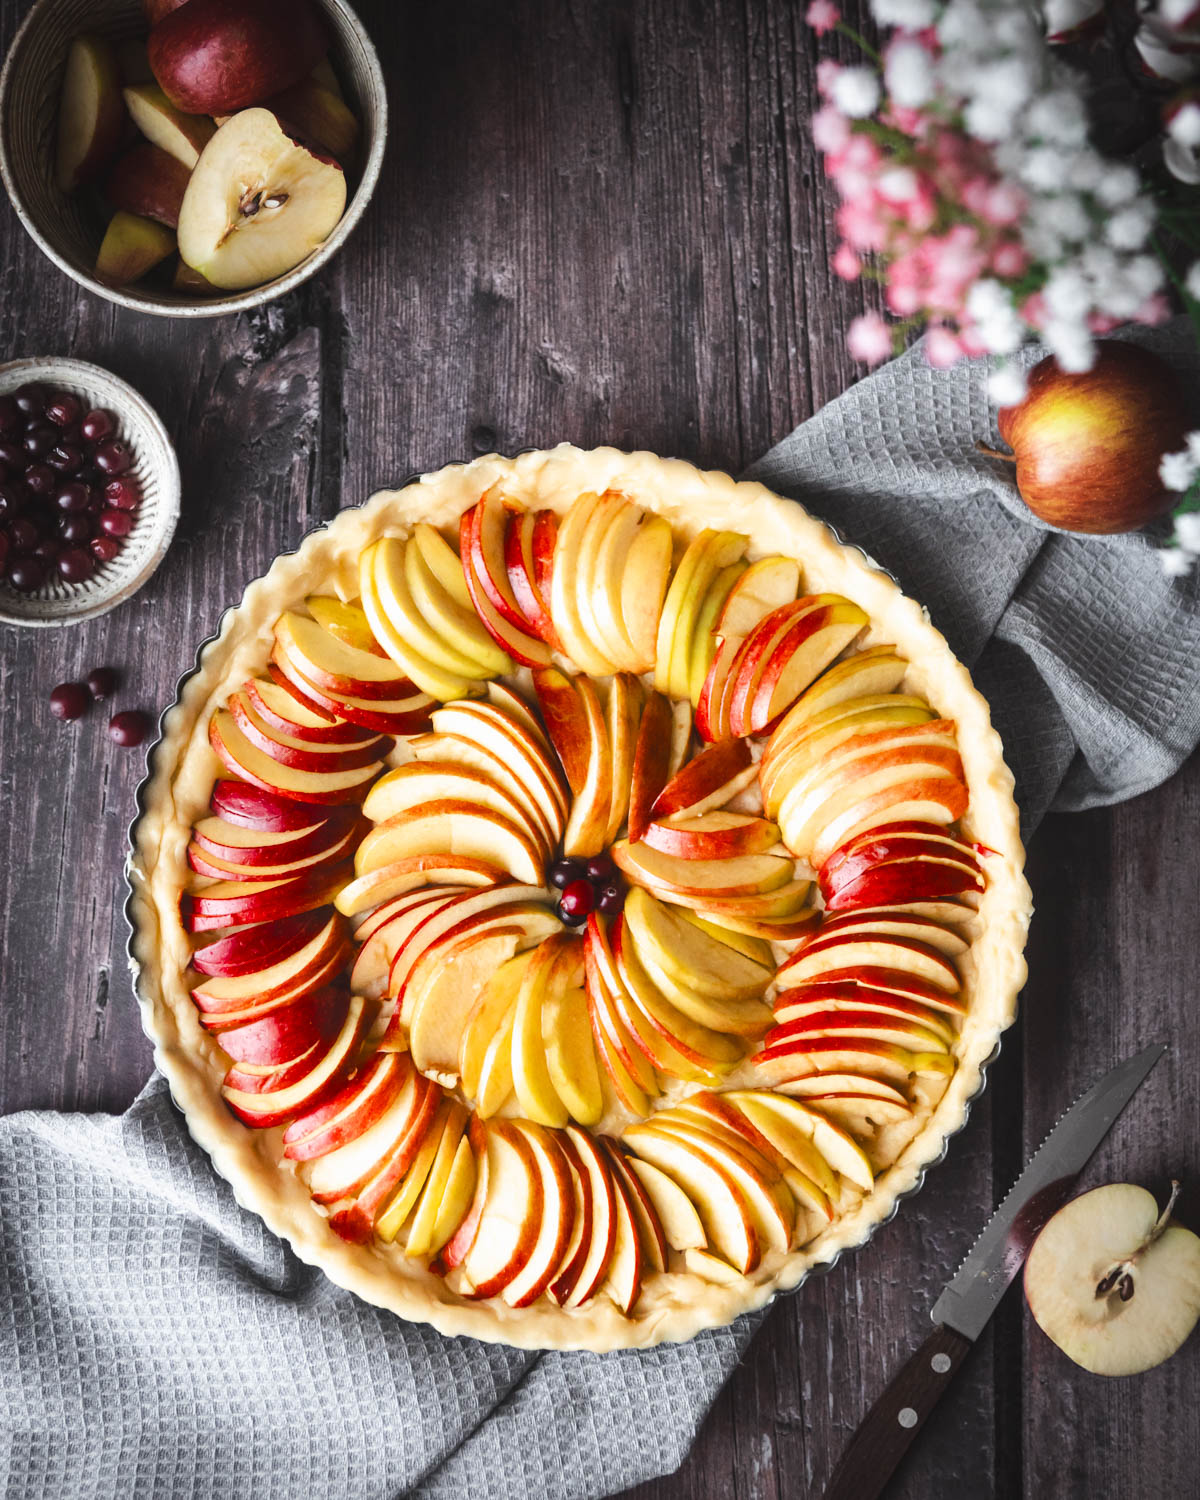
Top-Down (90°) or Overhead Angle
The flat lay is the food photography darling. Picture this: a perfectly arranged table with an overhead shot showing off all the deliciousness. It's clean, organized, and visually satisfying. The 90-degree angle is frequently used in food blogs and Instagram since it helps capture the dish's overall styling and the table setting. It's also a great angle to experiment with different composition techniques.
When to Choose:
- Flat Subjects or Dishes with Distinct/Beautiful Top Layer: Perfect for flat foods like pizza, salads, charcuterie boards, or breakfast spreads. It lets you capture all the details in one frame.
- Group Photos: Shooting multiple dishes? Top-down gives everything equal attention. Think brunch spreads, potluck tables, or those lovely holiday buffets.
- Ingredient Shots: Need to showcase the recipe elements? Arranging raw ingredients in a tidy flat lay is convenient and comprehensive for the viewer.
- To Showcase the Table Setting: I do this a lot on Instagram and other social media platforms to give a feel for the whole table arrangement with different props and to tell a story, for instance, showing a dish in various stages of its preparation.
When NOT to Choose:
- Height Matters: Avoid this angle for tall foods like burgers, sundaes, or towers of pancakes. From above, they'll look flat (pun intended) and uninspiring.
- Crowded Compositions: If there's too much happening, a flat lay can quickly feel chaotic. Keep it simple!
Things to Keep in Mind:
- Use props sparingly. Think utensils, napkins, or even a hand reaching for a cookie. Add these details to keep the shot dynamic without overwhelming the scene. Remember that each element has to have a reason for being in the shot. An Easter bunny in a summer cocktail shot won't make much sense, will it?
- Use elements of different heights to add some blur and create different dimensions in the image.
- The focal length of the lens: Use a lens that can capture a wider angle. Otherwise, you might need to raise the camera inconveniently or even unrealistically high. I use my 24-70 mm lens most of the time for overhead food photography.
- Be mindful of camera distortion. It's important to level your camera or phone you're shooting with to ensure the food doesn't look like it's going to fall out of the frame.
- This angle loves a wider depth of field to ensure all the major elements are in focus. However, some purposefully blurred elements will add depth to the image. It's, therefore, important to consider the height of the food and adjust the depth of field depending on the desired outcome.
- Use a C-stand or a tripod with an overhead arm to help you arrange the scene.
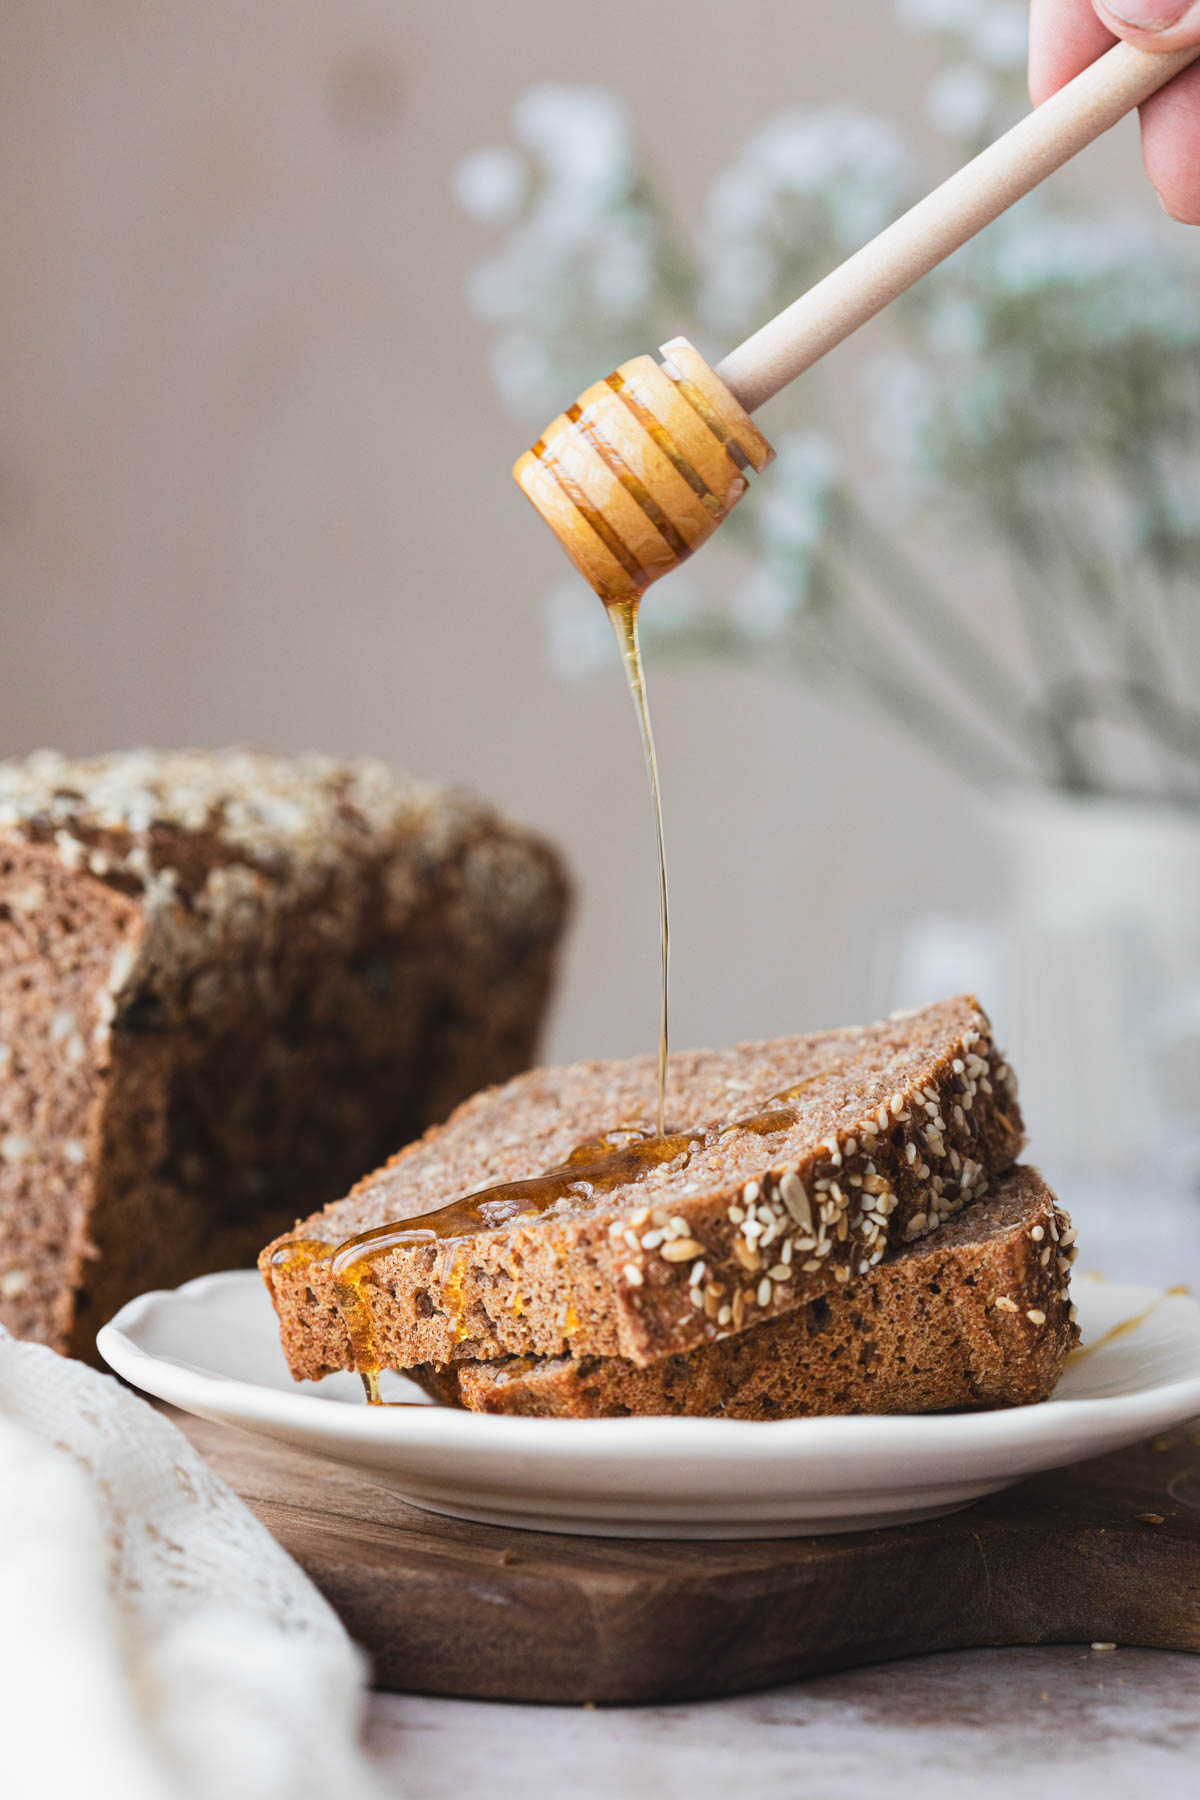
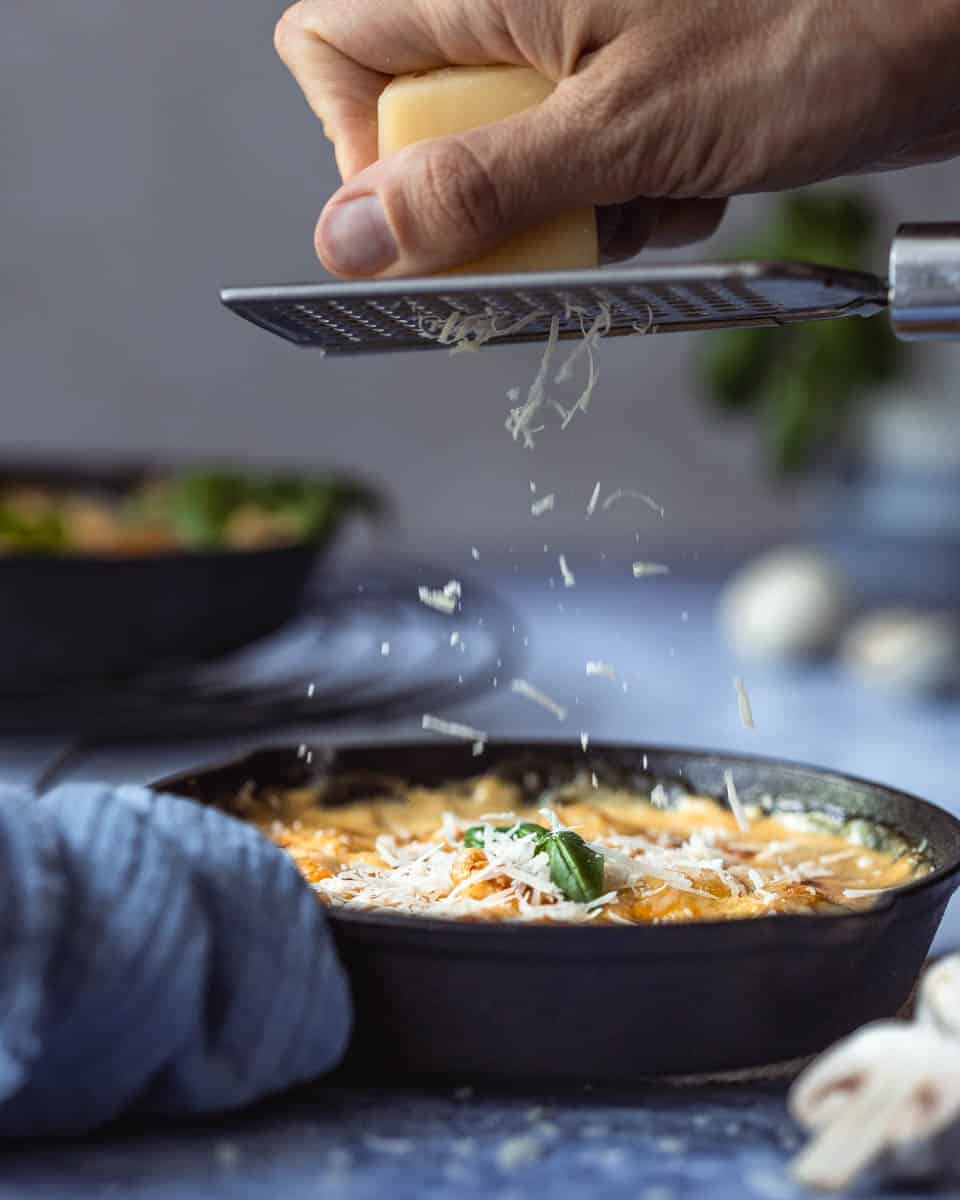
Straight On (0°) Angle
Straight-on shot is exactly what it sounds like: you're at eye level with the food. This is one of the most popular angles and the MVP for tall and stacked dishes.


When to Choose:
- Height Showoff: Ideal for taller subjects and food with different layers, like burgers, layered cakes, parfaits, stacks of cookies, or sandwiches. You want viewers to admire every delicious stack. It's also a go-to angle for commercial food photography and is frequently used in product shots.
- Action Shots: Pouring syrup, melted cheese stretches, or forkfuls of pasta look mouthwatering from this angle. I like showcasing cheese pull and pouring sauce using this camera angle.
- Tighter straight-on shots allow you to use fewer props and focus more on the subject. It's convenient when you're uncomfortable with busy shots or don't have many matching props to showcase.
When NOT to Choose:
- Flatter Foods: Straight on makes pancakes and pizzas look like the sad, one-dimensional friends of the food world.
- Overly Detailed Tables: It can't capture full tablescapes, so reserve this angle for solo dishes or close-ups.
Things to Keep in Mind:
- Play with your foreground and background to add dimensions to your image. Neutral tones (wooden tables, clean walls) keep the focus on the food, while a blurred restaurant kitchen or rustic shelves add a cozy atmosphere.
- Aim for a balanced composition so that all the "weight" with large or bold elements is not stacked on one side of the image (unless it's done with a purpose).
- Mind the horizon line: the image needs to be straight so the bowl of soup isn't tilted, expecting the liquid to leak out. You might not notice the tilt with your eye through the camera's viewfinder. It's, therefore, worth making the shot a little bit wider to allow for corrections during the editing stage if needed.
- Choose a lens that captures stunning details of the dish. I prefer my 100 mm macro lens for most straight-on angle shots for its beautiful bokeh and sharpness.
- Avoid deep dishes that hide the food that's served in them. You'd rather want the viewer to focus on the soup, not the bowl it's served in, right?
- Use a tripod with a ball head to help you arrange the table scene and capture beautiful action shots using this angle.
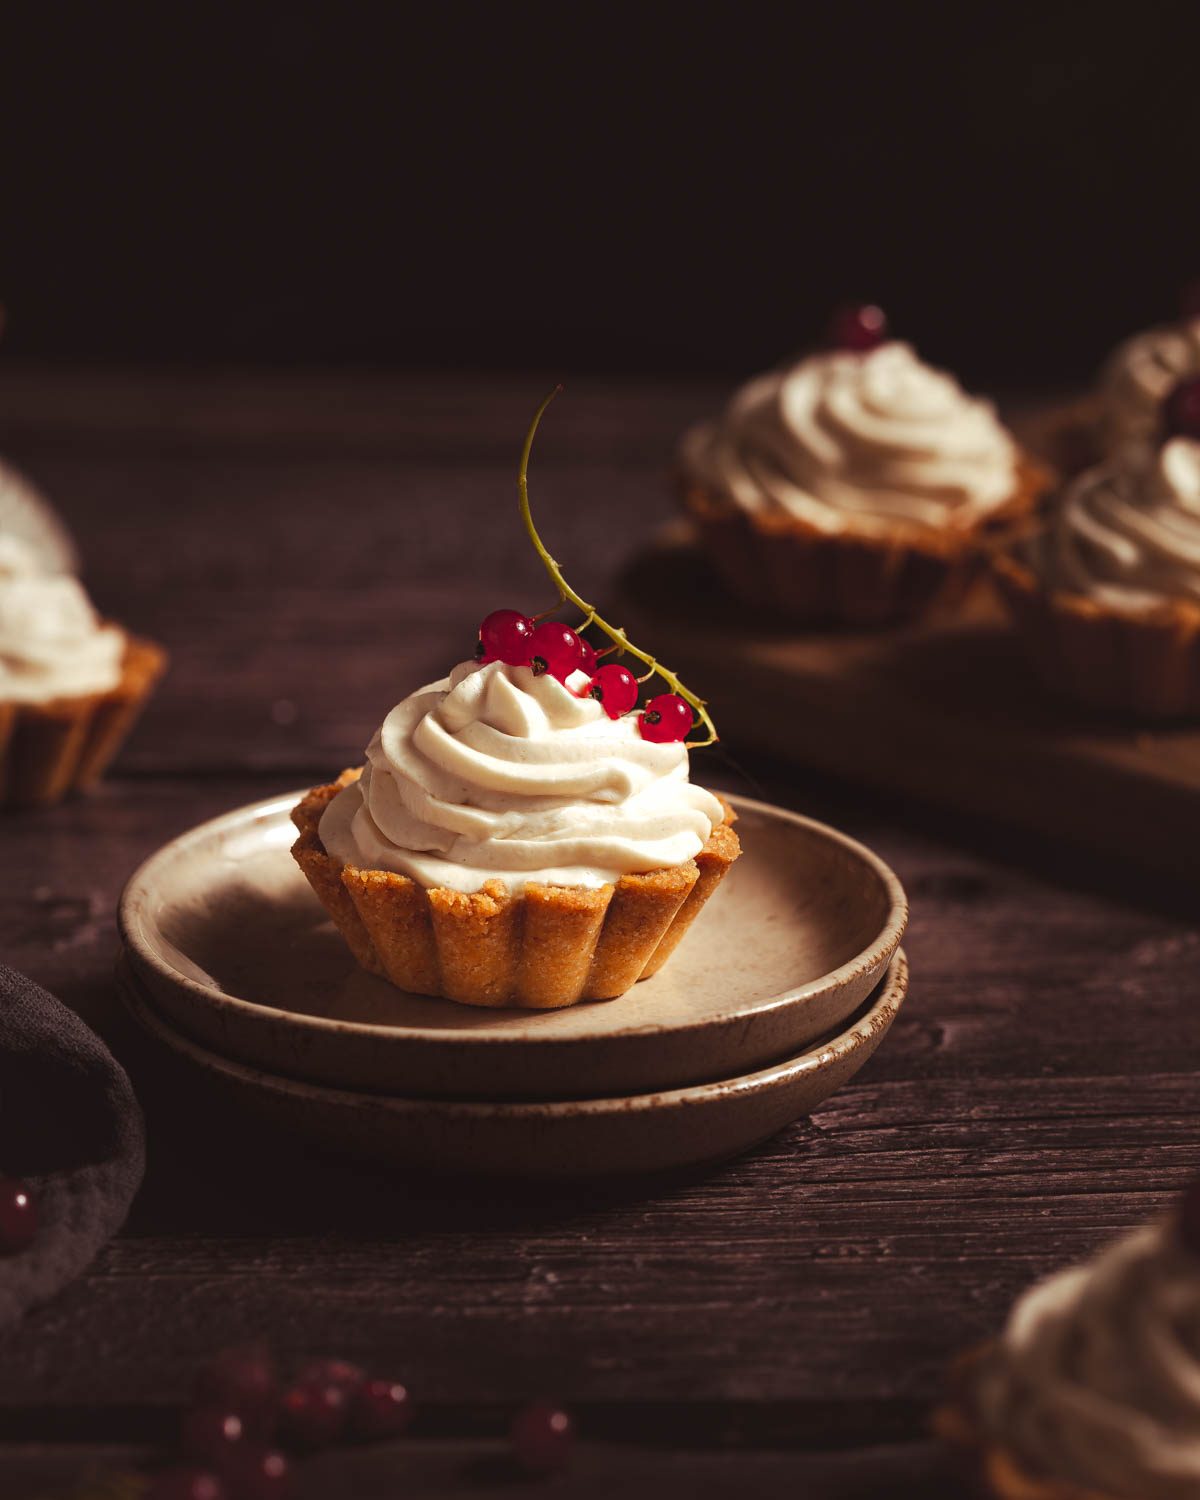
¾ Angle
The ¾ angle (aka 45-degree angle) is a versatile angle, offering depth and personality without overwhelming your viewer. It's the Goldilocks of food photography angles.


When to Choose:
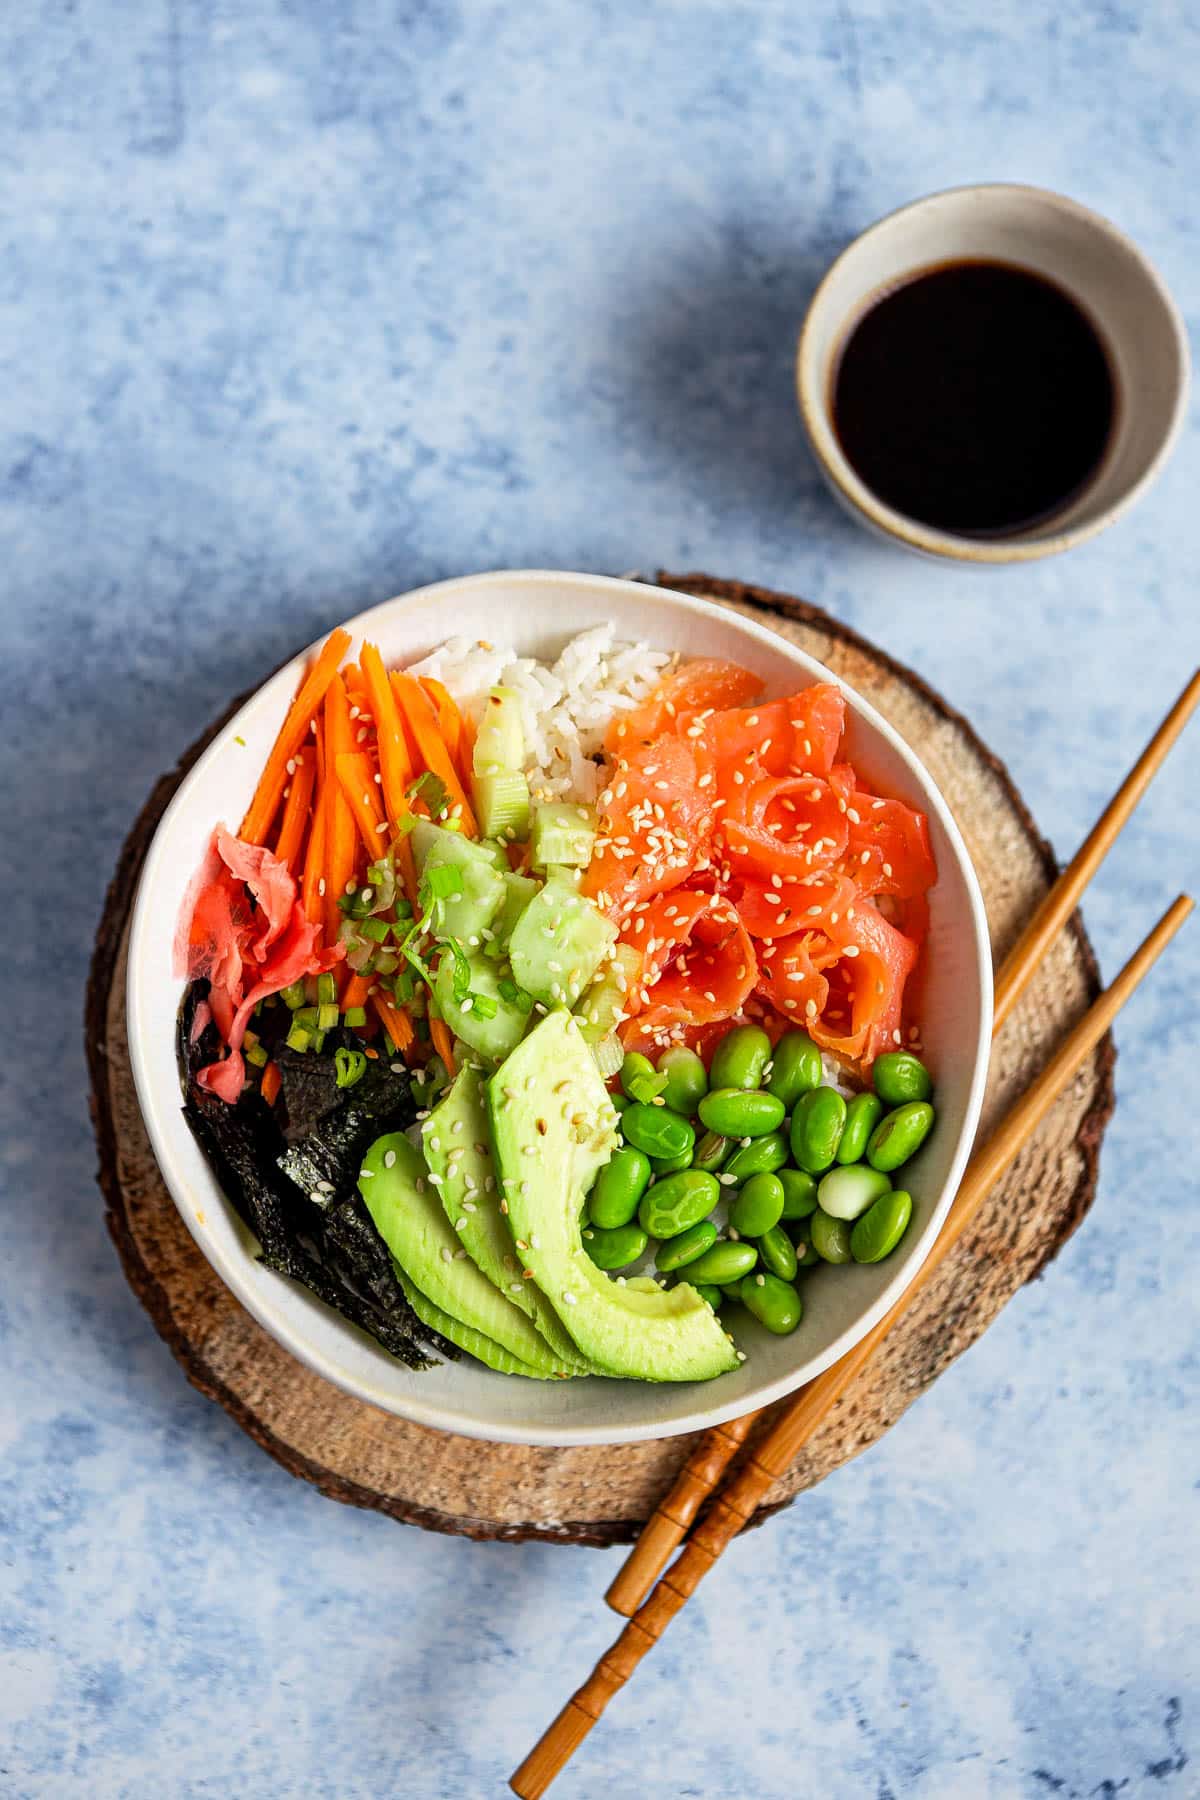
- Individual Dishes: This is a good angle for almost any food - soups, bowls, pasta, you name it. It allows us to view the dish from the viewpoint of a person sitting at the dining table, creating a very realistic look at the finished dish. It helps you showcase the dish's top and the side of your subject so you can enjoy it all without major compromises. I also love this angle for drinks because it allows you to capture both the drink, its garnish, and the glass it's served in.
- Full of Texture: Close enough to show detail but wide enough to give context. Think flaky pastries, poke bowls with various ingredients, or shimmering frosting. It's also great for capturing a mouthwatering macro shot. I frequently use my 100mm macro lens for this purpose.
- Lively Settings: This angle shines in lifestyle food photography, where you want to include hands, utensils, or drinks in the frame.
When NOT to Choose:
- Massive Spreads: ¾ can make wide setups look confusing or cramped. Top-down works better for these.
- Extreme Close-ups: This isn't the best choice for showcasing intricate details like dessert toppings. Go 90° or straight on instead.
Things to Keep in Mind:
- Consider the depth of field. Place your hero dish in focus and let the background gently blur, but make sure that the main subject (or the particular element you're shooting) is fully in focus. Shallow depth of field can create a very dreamy feel and a beautiful bokeh, but it can also ruin an image. You might need to adjust the distance from the camera to the subject or the angle slightly to ensure the subject is in focus.
- Add complimentary dishes or additional props for storytelling so the subject doesn't look out of context and lost in space.
Bonus Tips & Tricks
Mind the Light:
Lighting can make or break a photo. Natural light is your best friend (when it's available), but artificial lighting is much more reliable and consistent and can help you create stunning photos once you master it. I use flash a lot in my indoor shoots, so I'm not limited by daylight hours, especially during autumn and winter. You can find a full list of my artificial lighting equipment in this article.
Composition is Key:
- Even if you think that rules are made to break them, they are always a good starting point. Choose what works for you, and don't forget to experiment so your shots don't become boring.
- Layer it up: Napkins, plates, bowls, and even crumbs can add character to your photo. (Yep, artfully-placed crumbs are totally a thing.)
Props & Garnishes:
Show some love to the surroundings. Fresh herbs, cracked pepper, or dripping sauce can add mouthwatering appeal. Think of elements that belong to the scene and help you tell a story. For instance, it could be a cutting board with a freshly cut loaf of bread in a breakfast toast scene or scattered potatoes and onions in a potato gratin image. Think of the process of cooking, serving, or enjoying the dish.
Edit Without Overdoing It:
Use tools like Lightroom, Photoshop, or even your phone's editor to enhance brightness, contrast, and sharpness. But be careful! Over-saturated shots can make food look fake, and nobody wants to eat neon spaghetti.
Experiment & Break the Rules:
Rules are great, but creativity is better. Test angles, add dramatic lighting, or capture mid-air sprinkles of powdered sugar. Let your imagination (and appetite) run wild.
Plan Your Shots in Advance:
Changing different angles will often require adjusting or even completely changing the composition, which takes a lot of time. What looked great from above can look messy from the side. Also, it might not be a great idea to start with a straight-on action shot where you raise a spoonful of soup (ruining the top of the food) before capturing a top-down shot of the finished dish. Planning your shots and executing them logically will often save you time and nerves.
Play with Negative Space:
Negative space is not something you should always avoid. Sometimes, the dish itself is such a strong element it needs some space around to breathe. The key is to ensure the image looks balanced and pleasing to the eye.
Choose the Angle(s) with Purpose:
Sometimes, your best images will be unplanned and spontaneous, but in the majority of cases, you'll want to plan the angles depending on the specific features of the food you want to showcase. Think of the elements you want the viewer to focus on and choose the angle that serves the purpose best. For instance, if it's a textured cake frosting with juicy slices of orange, choose an angle that shows playful reflections of the light and the depth of all the elements in the frame.
Wrapping It Up
Food photography doesn't need to be overwhelming or pretentious. Whether you're shooting grandma's apple pie or creating a killer shot for your food blog, the right angle and some thoughtful details can take your photos from "meh" to "mouthwatering." Now go forth and make your viewers hungry!


Share your comments, rate, or ask a question!